Jump to content
Jump to current country selection
HP.com Canada home Products and Services Support and Drivers Solutions How to Buy
» Contact HP
HP.com Canada home
Everyday Printing  >  Home office ideas

Polish your look with HP Professional Presentation Books

See how and when to use this easy and professional binding solution.
» 

Home & Home Office

»

Everyday Printing

» Printer buying guide
» Printing tips & how-tos
» Ink, toner & paper
»

Digital Photography

»

Everyday Computing

»

Digital Entertainment

»

Activity Centre

Browse & Buy

»

Shop Hpshopping.ca

»

Rebate Center

Product Support

»

Support & troubleshooting

»

Software & Drivers

»

Warranties & services

»

Register your product

Content starts here

»  Where to find HP Presentation Books
»  Make your pages look professional
»  Presentation book advantages
»  How to assemble your presentation book
»  Create your title page
»  Make your presentation stand out
»  Try your own HP Professional Presentation Book now
Easily insert pages into a book

Introduction

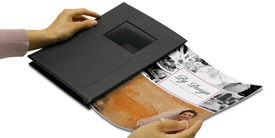
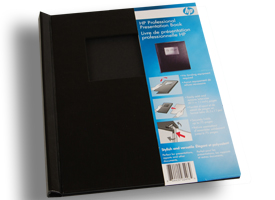
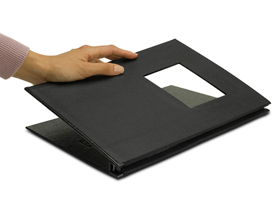
An HP Professional Presentation Book allows you to bind up to 75 pages without equipment, offering an immediate, inexpensive way to add polish to any project.


Where to find HP Professional Presentation Books

Book with label

Hpshopping.ca is a convenient place to order as many of these easy-to-use books as you need and have them delivered right to you.


»  Back to top

Make your pages look professional

Examples of suitable contents
Any 8 ½" x 11" prints that need to look polished and professional are perfect candidates for this simple-to-use book.
  • Portfolios
  • Professional presentations
  • School reports
  • Thesis presentations
  • Quarterly reports

Pages smaller than 8 ½" x 11" fit, too!


»  Back to top

Presentation book advantages

A Professional presentation Book

HP’s Professional Presentation Books also offer advantages beyond a polished image:

  • Freedom
    Stop relying on copy shops, their schedules, and their prices to get impeccable results.
  • Pristine originals
    No holes or adhesives needed.
  • No equipment
    Bind materials securely without equipment.
  • Flexibility
    Easily add, subtract, or rearrange your materials.
  • Safety
    Protect documents from bending and the elements as you transport them.
  • Savings
    These books are re-usable, making them economical and better for the environment than bindings that can’t be re-used.

»  Back to top

Assemble your presentation book

Book’s spine opening

Assemble these books in three simple steps

  1. Fold back the covers of the book, preferably on a hard, flat surface.
  2. Insert your pages (between one and 75 pages of regular paper) in the open spine.
  3. Gently let the book covers shut.
Helpful hints:
  • A paper or binder clip on the right-hand side of your pages can keep them aligned while you place them in the book’s spine.
  • Rest the pages against the metal guide at the bottom of the spine to position them properly.

»  Back to top

Create your title page

Title page to fit window

Screenshot of selecting MARGINS

Select Margins in Page Layout menu.


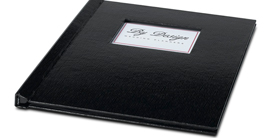
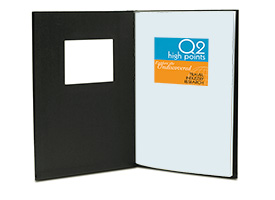
Each Professional Presentation Book has a 4" x 3" window you can use for an attention-grabbing title. To design for this window in Microsoft Word, use the following settings:

For Windows Vista:

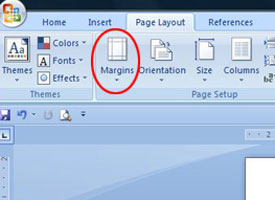
  1. In the Page Layout menu, select Margins.
  2. Scroll to the bottom of the margin choices and select Custom Margins….
  3. Enter the following values:
    Top: 2”
    Left: 2.3”
    Bottom: 6.2”
    Right: 2.6”

With these margins, your design will fit in the window. However, always be sure to do a test print and insert it in your Professional Presentation book.

»  Back to top

Make your presentation stand out

An eye-catching presentation

An aesthetically pleasing presentation can help get—and keep—people’s attention.

  • Use the right paper
    When you use 20 lb. weight HP Multipurpose Paper in your books, you can fill them to their 75-sheet capacity. However, for smaller presentations when you really want that “wow” factor, try printing on HP Premium Presentation Paper.
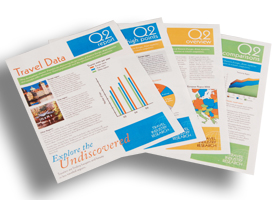
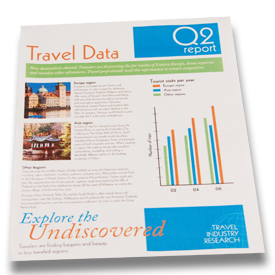
  • Add visual aids
    Clarify your message by adding informative illustrations, charts, photos, and graphs.
  • Use colour
    Coordinating the colours of your photos, text, and background will make your message more cohesive. 
  • Use restraint
    Avoid clutter, and don’t be afraid of leaving some white space.
  • Proofread
    Few things can damage your professional image more quickly than spelling and grammatical errors. Even the best writers should have a second set of eyes go over their work.


»  Back to top

Try your own HP Professional Presentation Book now


»  Back to top

Printable version
Privacy statement Using this site means you accept its terms Feedback to Webmaster
© 2011 Hewlett-Packard Development Company, L.P.