First try using e-mail1 to transfer photos from your phone to your PC since it is probably the most widely available option.
- To begin, create a new contact that is your e-mail address. (Your phone manual will tell you how to create a new contact.)
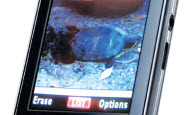
- Next, open the photo you wish to transfer.
- Click on the options button and select “Send.”
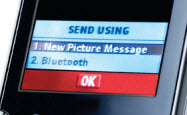
- Choose how you want to send it: “New picture message” or “Bluetooth.”
- Add the contact that has your e-mail address and press “OK” or “Send.”
- Open your e-mail program on your PC and check the in box. You should have an e-mail from your phone service with a photo attachment.
- Right click on the .jpg file and save it into your pictures folder (or a new folder you create).
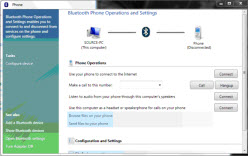
If your PC and your phone both have Bluetooth capabilities you may be able to send your photos to your PC wirelessly. To set up this transfer you must first click on the PC’s “Start” menu and select “Control panel.” Under the Hardware and Sound menu select “Add a device.” On your cell phone, turn on your Bluetooth and make your phone “discoverable.” Your PC will then show your phone in the “Add a device” window.
- Double click the phone icon and the PC will give you an authorization code to punch into your phone. This allows your PC and phone to transfer files to each other.
- On your phone open the photo you wish to transfer.
- Under the options menu click “Send.”
- Choose send using “Bluetooth.” The phone will then send the photo wirelessly to your PC.
- You will then see a notification from the PC and the picture will appear in your Pictures folder.
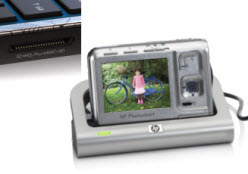
If your phone has a memory card, you can remove the card and slide it into the PC’s 5-in-1 reader to transfer your photos (Make sure you use an adaptor for mini and micro cards). See the camera photos section for more information on memory card photo transfer.
This is where Windows Live Photo Gallery software makes photos fun. If you don’t have Windows Live Photo Gallery installed, download it for free here:
- From the Start menu, click the Windows Live Photo Gallery icon.
- Click on a photo you’d like to edit. You can rotate, crop, auto-enhance, fix red-eye or fine tune it each image. Don’t worry about making a mistake or not liking the changes. You can always undo the change or revert to the original.
- Order prints through your choice of retailers by clicking on “Order prints” under the Create tab.
Use Windows Live Photo Gallery to easily share your photos with friends on your favorite social networking sites like Facebook, YouTube and Flickr.
- Select the photos or videos you want to upload.
- From the Home tab, in the Share group, select a publishing destination, and then follow the on-screen instructions.
- If your favorite social network isn’t listed, you can add it to the Share group by clicking on the Add Plug-in from the drop-down menu, and then follow the on-screen instructions.