PC Learning Center
Support & Drivers

Introduction
Creating a digital keepsake as a gift for a friend or for your own enjoyment is easy and fun. Whether you are producing a slide show for a family get-together or a digital resume for film school, you can fill it with songs, photos, videos or all of the above for a truly unique compilation that will last much longer than VHS.
Transferring VHS to DVD

Transferring analog footage (VHS or from your analog camcorder) to digital is quick, easy and makes memories last for generations to come. You can also edit your content, add titles to scenes, and even add music or narration.
Simply connect your VCR to the HP Digital Entertainment Center or HP Media Center Photosmart PC and your footage will be digital in minutes—and viewable on both PCs and TVs. Here are the basics you need to know to complete this easy process. Equipment you’ll need:
- HP Digital Entertainment Center
- VCR or analog camcordera
- Composite video/audio cable
- Blank DVD media
Step 1: Hook up your VCR or analog camcorder to the front of your HP Media Center PC or HP Digital Entertainment Center and turn on both machines.
Step 2: Open your movie software and start a new project.
Step 3: Select how you want the video captured. Capture your analog video content and convert it to digital format.
Step 4: Edit your video clips by adding credits, adjusting the length of the clip, adding music and more.
Step 5: After organizing your clips, add a menu with chapters.
Step 6: Now you’re ready to burn your DVD! Keep reading to find out how.
Rip and burn
The term “ripping” means transferring digital audio tracks from a CD onto your computer. First, you need digital music management software on your computer. (Most come with players or you can easily download one.) To rip a CD with audio tracks, just select “File > Import,” then select the CD.
To burn a music CD from a player such as iTunes:
- Create a playlist. Select “File > New Playlist” and drag the songs you'd like to burn into the playlist folder.
- Arrange the songs to your liking, and then name your playlist.
- When you've got your perfect mix, insert a blank CD into your disc drive and highlight your playlist. The “Browse” symbol in the upper right of the window will change to “Burn Disc”.
Before you burn a CD, check your preferences to make sure you're getting the file type you want (Audio CD, Data CD, MP3 CD) and set the number of seconds between songs (typically two).
Capture photo memories

Whether it's a souvenir of an event or a way to keep distant friends and family close, a photo disc lets you collect and share those memories for years to come. When burning a photo disc, include a text document containing captions, stories, journal entries or letters so that each photo has its own individual frame of reference.
Give all the photos file names that make sense (for example, "Birthday_cake.jpg" or "Beach_honeymoon.jpg"). Also, try organizing the pictures into folders categorized by subject, location or date.
If scanning snapshots, use HP Photosmart Essential Software to retouch tattered edges, tears, folds, discolorations and red-eye.
For a true multimedia experience, turn your photographs into an engaging slide show, and then burn your slide show to disc. (Be sure you burn it as a data disc.)
Personalize your CDs and DVDs with LightScribe
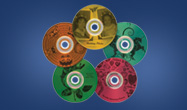
There’s no limit to your creativity when you personalize your gifts for that perfect finishing touch. LightScribe-enabled PCs from HP and a specially coated disc allow you to burn silk-screen-quality photos and text labels directly onto your CDs and DVDs. With LightScribe media you no longer have to deal with messy, unprofessional labels—a personalized label “wraps” your gift in style.
Produce beautiful gray-scale images similar to black-and-white photography with affordable, easy-to-use LightScribe technology.
You can also create beautiful custom labels without LightScribe. Visit the HP Activity Center for great ideas and easy instructions.
Personal filmmaking

Digital technology has transformed movies—not just how they're made, but what and how you view. In the 1990s, artists began taking advantage of technological advances and the lower cost of filmmaking—shooting with digital camcorders and editing on computers. The result? Audiences are enjoying more diverse films than ever before.
Many people already own a digital camcorder and are beginning to purchase more versatile home PCs, like the HP Media Center PC, which include video-editing software and DVD-burning capabilities. You can craft home-movie footage into polished pieces, and even venture into amateur filmmaking. Many up-and-coming independent filmmakers started this way.
Conclusion
Jumpstart your creativity with innovative technologies from HP. Whether you want to create a special, personalized CD or transfer old home movies to digital format, HP makes it easy, fun and affordable.